Thursday, 28 March 2013

My First Craft Fair!


I am currently feeling a mixture of nervousness and excitement (more nervous than excited if I'm honest) as I have just signed up to do my first ever Pocket Wren craft fair. 

It's all been pretty last minute so now I am running around trying to organise myself. So far I have got lots of very long to do lists with not much crossed off yet! I'm just hoping that I will have everything ready in time!

The details of the fair are on the poster above. It's on Saturday 6th April at The Gallery at St Georges House which is in Bolton town centre. So if you are in the area do stop by and have a look!

Wish me luck!!

Monday, 25 March 2013

New Peacock Themed Illustrations.

Framed peacock illustrationFramed Peacock Illustration

I have just added some new Peacock themed illustrations to my range at Pocket Wren.

They are both based on a hand drawn illustration I created a while ago. I have now finally had some spare time to do something with it. 

The original line drawing was created using Micron fineliner pens. I then scanned it in and used a combination of Photoshop and Illustrator to create the images you see here.

To see more of these images and others visit Pocket Wren.


Saturday, 23 March 2013

How to create a lino print.


Lino Print Tutorial.


Having just recently got into lino printing myself I thought I’d share my methods and tips with you on how I go about creating my prints.

This is how I created the print featured in my previous post Handmade Three Seagulls Lino Print.


Lino printing is a relatively cheap, simple and versatile form of printing. It requires only a few basic tools to get started. Once you have mastered the basics the only limit is your imagination!

You will need:

Paper/fabric to print on

Block printing inks (widely available, I get mine on Amazon)

Lino board (again available online or from most craft/art supply shops)

Brayer (roller) I have a couple of different sizes.

Lino blades and handle to carve the lino (I have 5 blades and handle that I bought as a basic set)

Glass sheet to roll out ink (I use an old mirror, the glass from an old picture frame is another cheap alternative)

Lino printing equipment


The first step is to decide on a design and sketch it out on paper. Keep it simple to begin with, you can add more detail as you become more practised.

Initial sketch

Next you need to transfer your image onto the lino board. I do this by tracing over my image with a heavy weight pencil and then laying the image face down on the lino. I then apply pressure with a pencil over the reverse of the sketch which transfers it onto the lino. I then finalize the image on the lino with a permanent marker.

Image transferred onto soft cut lino

Once the image has been transferred you can start to carve away parts using a large blade for bigger areas and finer blades for the more detailed work. Always work away from yourself when cutting the lino and make sure your hands are never in front of the blade to prevent injury to yourself. It is so easy to slip when cutting! 

Remember that anything that you remove with your blade will appear white (or the colour of your paper/fabric) in your finished print as it will not take the ink. 

Sometimes with more complicated designs I take a photograph of my sketch and create a negative of it using a computer just to get an idea of how my finished print may look. Some people also take quick rubbings of their lino plate as they work to see how it is progressing.


Carved lino plate

When you are happy with how your lino plate looks it is time to start creating a print.

First put a small amount of ink onto your glass plate (I use an old mirror or sometimes an old decorating tray but anything that has a smooth washable surface will do). Roll out your ink using your brayer till it is spread thin and makes a tacky sound. Ensure that your brayer is completely covered with ink then roll onto your lino cut. Make sure the plate is completely covered with a thin layer of ink.

Inked up plate

There are different ways of creating a print but the way I do it is to have a piece of paper that is the same size as the one I intend to print on laid out on newspaper, this acts as my guide/template. I then place my lino cut face up where I want it on the sheet. Then using the first sheet of paper as a guide I line up a second (same sized) sheet and place it on top of the plate creating a sandwich. I then use a combination of rolling with a clean roller and rubbing with my hand (you can also use the back of a wooden spoon) to apply pressure evenly to the paper.

Applying pressure

Finally, carefully peel back your paper and you should have your completed lino print. If you are not entirely happy you can always go back, take some more lino away and reprint.

Final print and plate

Now comes the fun part, experiment with colours, papers, fabrics, textures and create as many prints as you wish!


Why not have a go? Get in touch let me know how you get on, I’d love to see if you have links to images!

For some inspiration visit the lino print section of PocketWren.


Monday, 18 March 2013

Illustration Friday: Eye Glasses.

Children playing on a trampoline illustration.

Here's my entry for this week's Illustration Friday topic of 'Eye Glasses'. 

I wish I was having half as much fun as these guys are!

Sunday, 17 March 2013

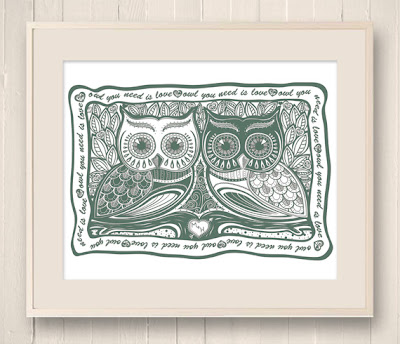
Owl you need is love illustration.

Owl pair illustration.

I've been working away on some more illustrations for Pocket Wren. This whimsical owl pair are my latest offerings. They are available in several colours have a look here. The heart at the bottom can also be personalised with the initials of your choice.

I wanted to try and create a woodblock printed feel to this illustration which I hope I have achieved, at least to some extent. 

I am now working on producing an accompanying bag using this image which will hopefully be available at Pocket Wren soon.

Thursday, 14 March 2013

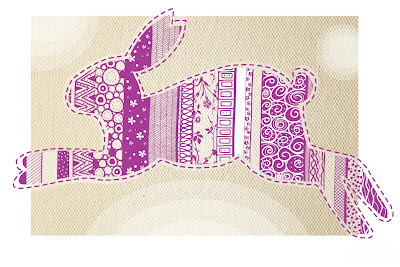
Spring rabbit illustration for Easter.

blue rabbit

purple rabbit

green rabbit
I am still working along an Easter/spring time theme at the moment. This jumping rabbit illustration is my latest creation and is available to purchase at Pocket Wren.


Saturday, 9 March 2013

Illustration Friday: Yesterday

Illustration of Jimi Hendrix.
Here's my image for this week's Illustration Friday topic of 'Yesterday'. Thought I'd go for a bit of a retro take on it with this illustration of Jimi Hendrix.

It may be more yesteryear than yesterday but I'm hoping that's close enough!

Thursday, 7 March 2013

Free download: Easter desktop wallpaper!

Easter rabbit and egg desktop wallpaper.

I know I'm a little bit early but I've started thinking Easter thoughts already. 

So with this in mind I have created this lovely Easter rabbit and egg desktop wallpaper design for you to download! Consider this my Easter gift to you! 

I have created a few different sizes. Just click on the one you want and save the background to your computer.

1024 x 768
1366 x 768
1600 x 900
Enjoy!


Wednesday, 6 March 2013

Helen Naylor feature on Bolton Business Boom.

Screen shot of Bolton Business Boom feature of Helen Naylor.

My work has just been featured on the Bolton Business Boom website! Click on the image above to read the full article.


Sunday, 3 March 2013

Illustration Friday: Talent.

Circus characters on a purple background.

Here is this week's entry for Illustration Friday. This week's theme is 'Talent' so I present to you my collection of very talented circus performers doing what they do best...entertaining!

This is a new illustration but I have stolen the characters from various circus themed book commissions that I have created over the years. I've done my best to squeeze all the fun and variety of the circus into one image!